Introduction
You surely have heard of external apps or custom activities that uses the REST api to communicate with Data extensions inside Marketing Cloud, or maybe you heard of creation of events, automations or maybe creating a new Content. If you haven't then you know it now!
But in order to get all that, you'll need an access token generated by Marketing Cloud, this token does not last that much, less than 20 min and it expires, so you'll have to ask for this token again whenever it expires.
In this Tutorial, you'll get to know how get this access token, and you'll be using POSTMAN and after that we'll use in a SSJS example.
Use case is clear ? Great! Now let's get back to business
Prerequisites
SSJS HTTP.POST method, check this article
Demonstration
In order to communicate with the REST API, first thing to do is that you're going to have a create a Server to Server package in the SETUP section in Marketing Cloud, once you're done with this, there will be two keys generated for you that'll help to get authenticated.
Of course this isn't enough, you'll need also an account_id, which means the business unit id you'll communicate with, for example you want to edit a Data extension in a particular BU, you'll need the token for it.
Not done yet!! There is something else you need to know that you'll have to provide, it is the grant_type and scope properties, the grant_type is what specifies what type of grant we're having, for Server to Server Integration this will always "client_credentials", and there is the scope that is a list of data-access permissions for your application, in a simple words, in the scope you can specify what you want to do with the token, for example if there is a request you have to add a record in a Journey, you'll specify in the scope that you want only that, so the token generated can't be used for other purposes.
I hope I was able to explain things in a good simple way!! Get know more about the token and scopes.
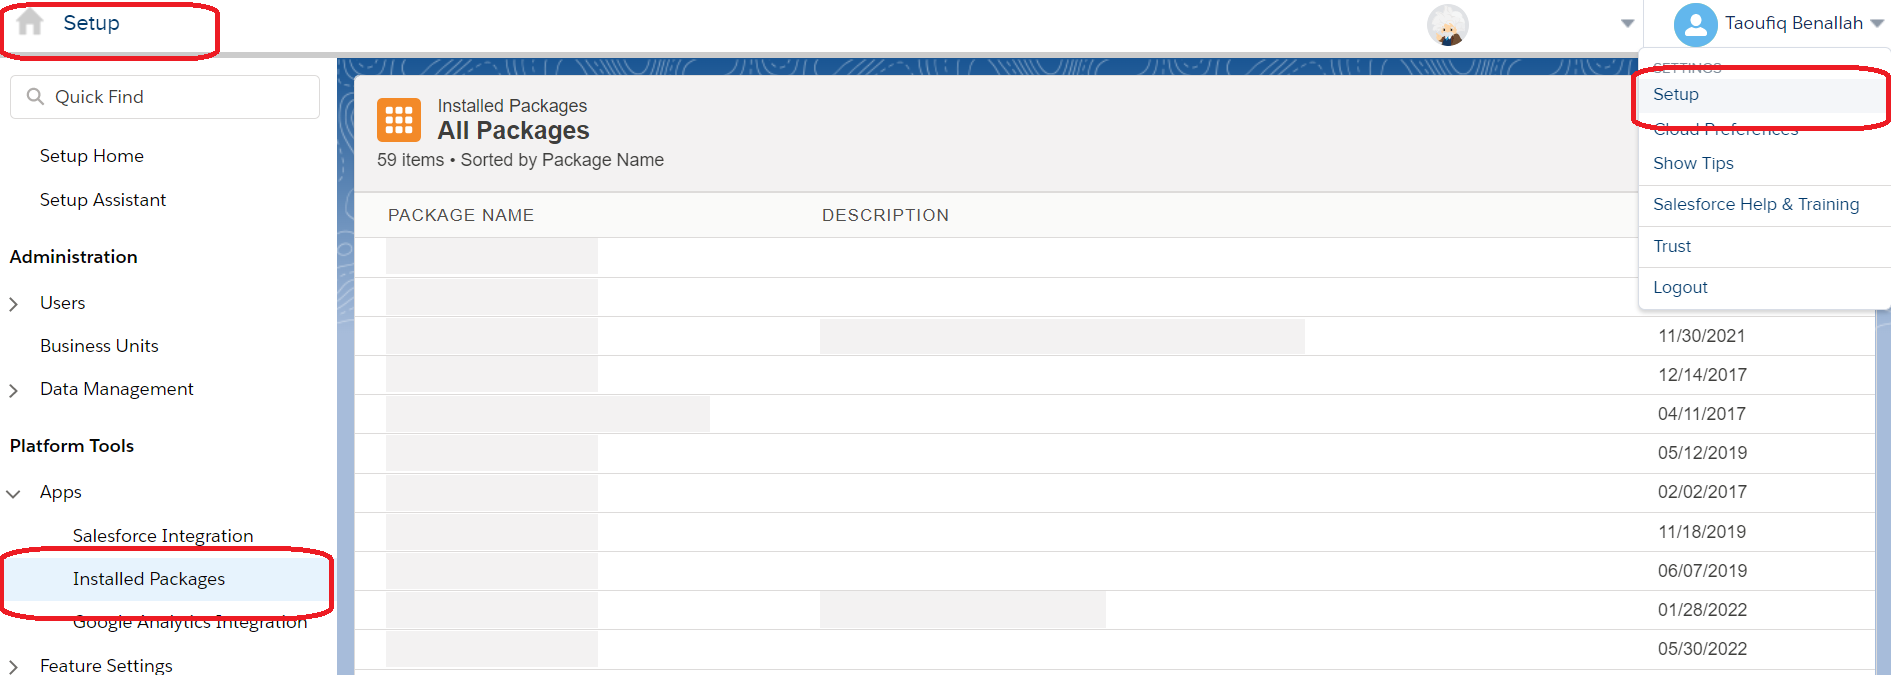
Let's get the credentials by creating first the package in the SETUP section, Go to SETUP > Apps > Installed Packages

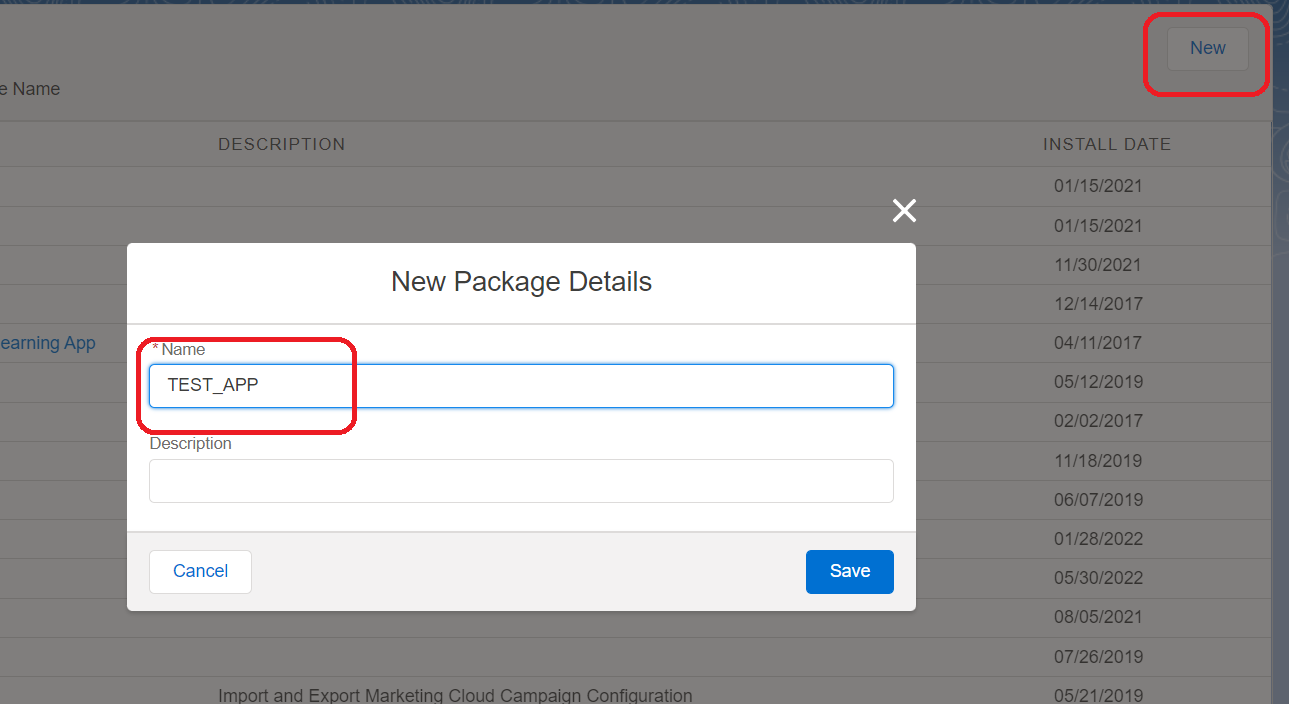
Then Create on New, and after you'll see a POPUP where you'll have to provide the name of this package.

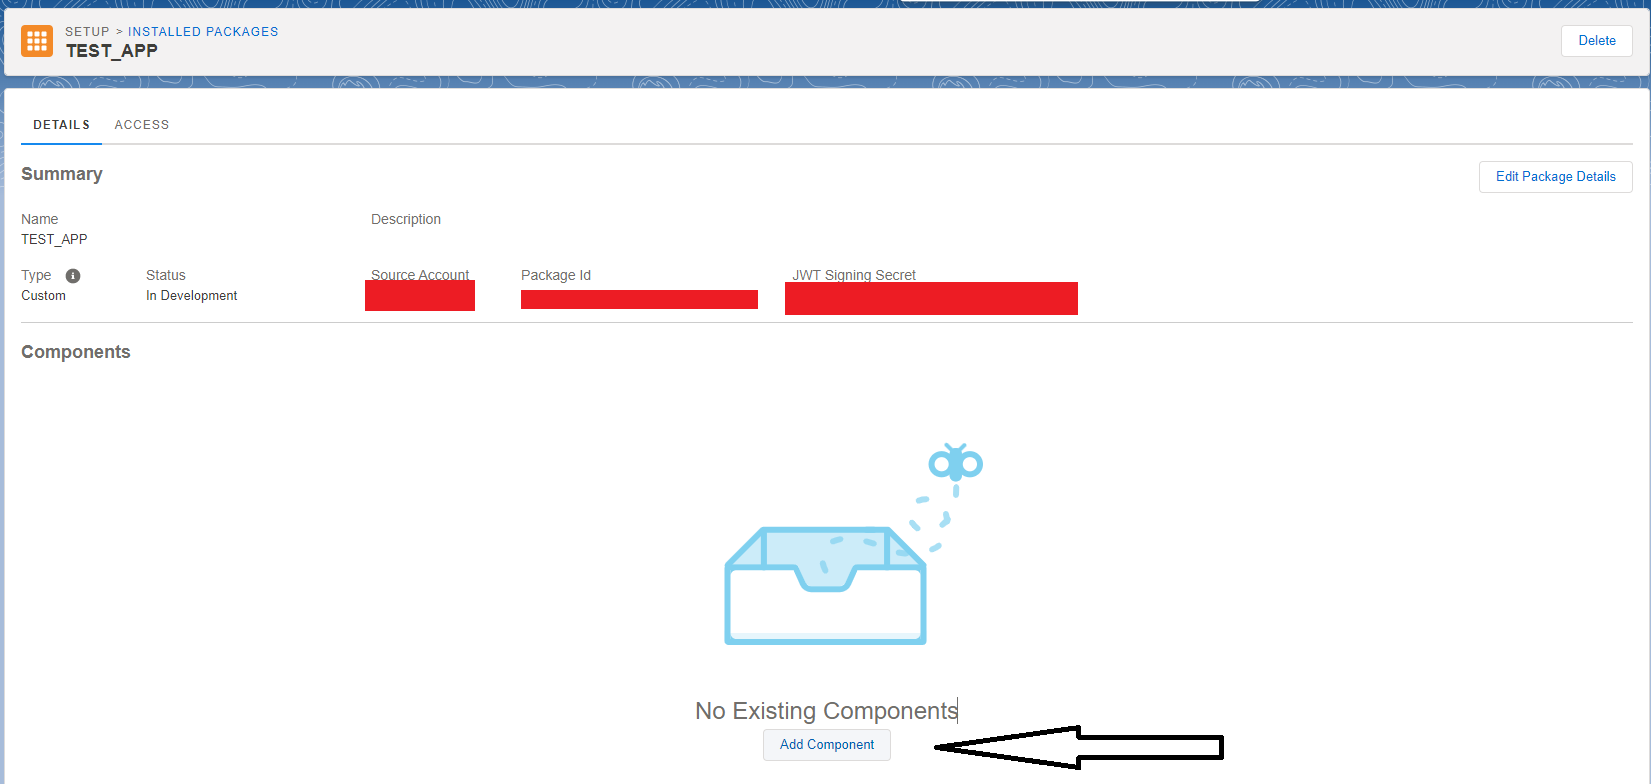
You'll see your created package and in it you'll add your Server to Server Integration component by clicking on Add Component

While creating your Component you'll get to specify the component type which an API component, then the Server to Server is the one to go with.

After that, you'll have to define scope as explained before, but you can keep empty for this tutorial, because we're not interacting with any SFMC feature, we need only the token.

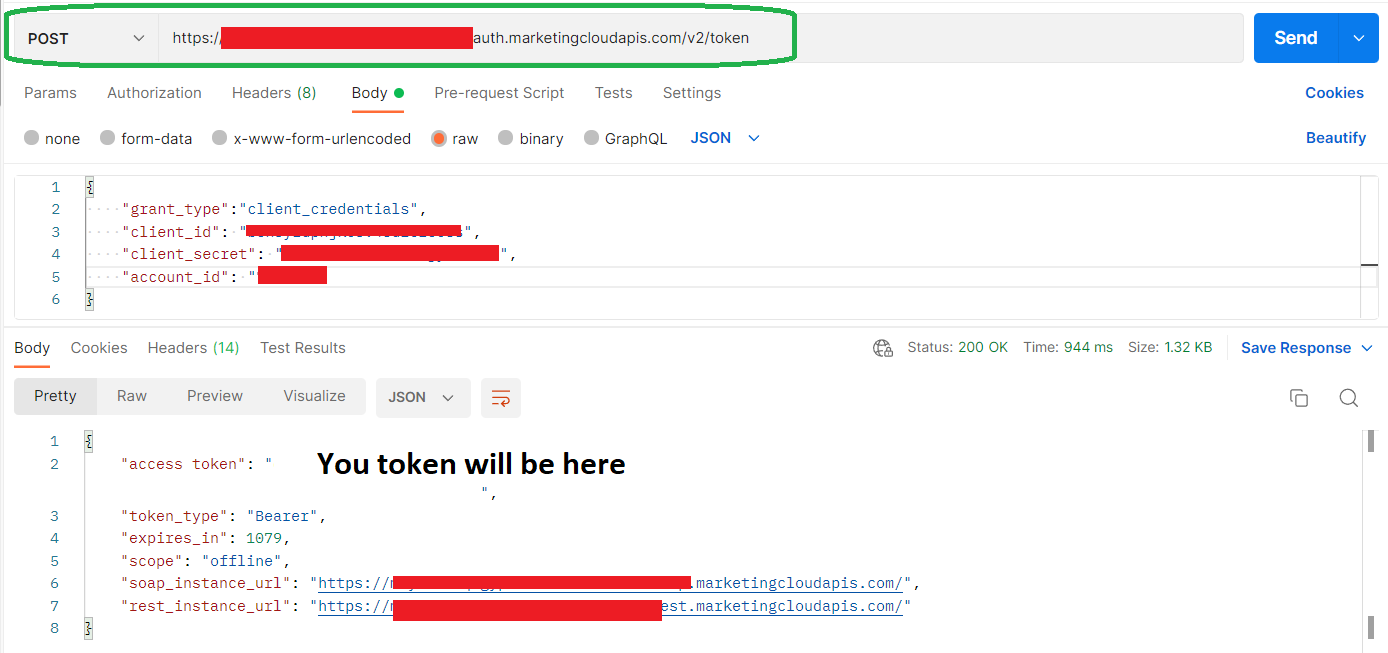
Now you have your client id and client secret! Congrats!! Also you have the Autheitcation Base Url which the one you're going to call to get the token and add /v2/token at the end.
Now let's test on POSTMAN

About the account_id ? you can check it in here, easiest task ever !!

And that's it! Easy right ?
And this is your SSJS script in the Cloudpage to get the access token, if you have managed to check the article about how to send HTTP POST request, then this script is just Basic Coding.
You provide your client credentials, business unit id and the auth url, you make your POST request, you get your response and parse it and get the token.
Here is the token : %=v(@token)=%
That's enough for TODAY!!
Conclusion
In this Tutorial, you had the chance to get the token that you'll need to make other API calls that requires this token, with a real life example done with SSJS, but can be implemented with AMPSCRIPT as well but also with other Language such us php, nodejs or any backend programming language. But it is very important that this token can stay in a safe place if you're working on an app and not making it accessible to non eligible users or hackers.